Warning - you can break your glass bed if you don't run leveling wizard before you home the bed or print something. Do it now - before you change the nozzle - or take the nozzle out of the block until you have started homing wizard.
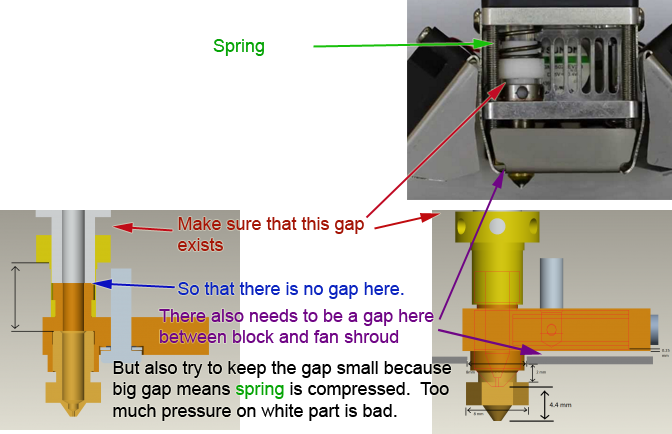
When attaching fan shroud as the final step, look from behind and make sure block isn't touching shroud. If it is the symptom will be that when fan comes on the nozzle can't get above about 210 or 220C and you will get a heater error. You can add a Kapton tape spacer around two edges of the block to allow a very tiny air gap between the metals. Or raise the nozzle some more.
If temp sensor is too tight in the new block you can open the hole up ever so slightly by using a #31 drill or a 7/64 or a 3mm drill bit. Drill out the existing hole and push drill sideways and twist for about 30 seconds at a time with drill on high speed while sliding it in and out. Test and repeat until sensor fits. Same for heater.
This next video is much more detailed and has you take apart more things but it's the way I usually change the block (I've done it about 6 times now) and it shows how to do it in more detail:
3DPrintThis video
If you have questions or problems and you are in the USA please contact "gr5" at thegr5store _at_ gmail.com. You can purchase other
Ultimaker2 compatible parts at this store (USA/Canada/Mexico customers only): gr5 store. For other countries
start here: 3dsolex.